The Payment Registration Pro module is designed to help you build a robust online payment or subscription system and will eCommerce enable your DNN portal. This software can satisfy both a professional user, interested in advanced functionality and a novice for whom simplicity is the main factor.
The module supports most major payment gateways and merchant account providers. If you do not have a payment gateway or merchant account setup, please contact Smith Consulting at 949-218-9600.
We are authorized re-sellers with Authorize.net Payment Gateways and Merchant Accounts. Because of our large portfolio of merchants we are able to offer very competitive rates and get you set up quickly. Additionally, users who qualify for merchant accounts can get free set up and configuration for their module.
Contents
Install the Module Package
The Payment Registration Pro module is delivered as a standard DNN installable zip or PA (Private Assembly). You install the Payment Registration Pro just like you would install any other DNN module. Before installing any module it's a good idea to back up your DNN database and DNN installation folder. This is very important, as you can always roll back to previous status easily if installation goes wrong.
You can read our full installation guide here.
[up to contents]
Create/Choose Registration Page
Create a new pages on your DNN site or navigate to an existing page.
Note: You can name the pages anything you want.
[up to contents]
Add Module to Page
Navigate to the page you created/selected in the step above and add the Smith Registration module to the page.
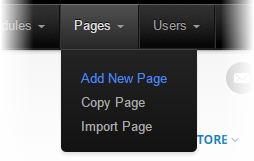
After adding the module the following Registration Admin Menu will be displayed:

[up to contents]
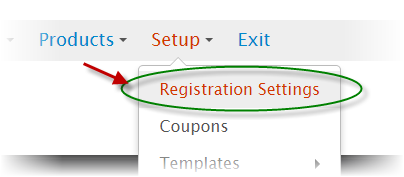
Configure Registration Settings
To configure the Registration Settings, hover your mouse over the Setup on the Registration Admin Menu then select the Registration Settings option as depicted in the following screenshot:
The following settings are required to be configured:
- Registration Name
- Mail To Email Address
- Mail From Email Address
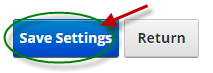
When you are finished configuring the settings above click the Save Settings button at the bottom of your screen to save the settings.
For a full description about the Registration Settings, please see the Registration Settings KB article.
[up to contents]
Product Setup
In order to successfully process a registration, a Product needs to be added. To add a Product, navigate to the Manage Products screen by clicking the Products option located on the Registration Admin Menu as depicted in the following screenshot:

After clicking Products the following Manage Products screen is displayed:
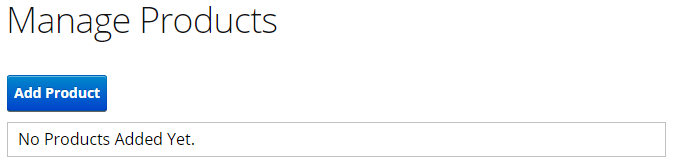
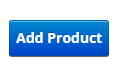
Click the Add Product button to enter the Product Setup screen.
The following Product Setup settings are required to be configured:
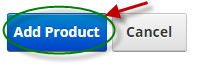
When you are finished configuring the Product Setup settings above click the Add Product button at the bottom of your screen to save the settings.
For a full description about the Product Setup, please see the Product Setup KB article.
[up to contents]
Registration Setup Complete
Congratulations, after the steps above have been completed you are now ready to test your new registration!
Click the Exit button on the Registration Admin Menu and you will notice your new Product has been created and your Registration form is ready to be filled out.
[up to contents]
Advanced Setup
For detailed information about the Payment Registration Pro module, please see the the Payment Registration Pro section of the Knowledge Base.
[up to contents]