To access the General Registration Setup settings, navigate to the Registration module and select "Setup" from the Registration Admin Menu
Contents
[up to contents]
Basic Settings
The following Basic Settings can be configured:

Registration Name – Enter the name of your registration form to identify the instance of the module in your portal.
Currency – Select the currency symbol that you would like to be displayed.
[up to contents]
DNN Registration Type
Select the type of user registration that is set in your DNN portal. If you are not sure, you can check this by navigating to the Admin Menu, select Site Settings, and under the User Account Settings tab you will see User Registration.
The following User DNN Registration Type options are available to be configured:
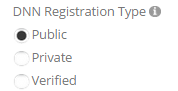
Public (Default) – Any user can register for the portal and access it immediately. The user will be added to the roles you configure in the product setup screen. To setup roles click the product setup button above. This is the least secure of the registration systems as there is not verification of users providing a functioning email address. Public registration uses the Smith Registration email templates. To setup Smith Registration email templates click the email template setup button above.
Private – Any user can sign-up for the portal, but an administrator must grant permission to the site prior to the user being granted any additional access. This is useful for sites in which you want to allow people to self register, but not be able to access the site until they've been approved. Private registration uses the DNN private registration email templates. Private registration email templates can be setup in the DNN -> Admin -> Languages tab.
Verified – This option requires users provide a valid email address in order to access the site. Upon registration, the module emails a verification code to the registering user and the user has to enter that code through the login screen before the registration process is complete. Verified registration uses the DNN verified registration email templates. Verified registration email templates can be setup in the DNN -> Admin -> Languages tab.
[up to contents]
Smith Module Integration
The following options allow you to configure integration options with Smith Cart and Smith Billing Manager modules:
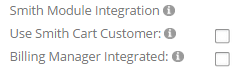
Use Smith Cart Customer – Check this box to enable the Smith Registration module to use the Smith Cart customer table for saving and retrieving customer data. If this checkbox is unchecked (default) the Smith Registration customer table will be used.
Please Note: This option requires that you have Smith Cart already installed.
Billing Manager Integrated – Enables integration with Smith Billing Manager module for the following 2 items:
- When invoice is emailed to customer from Billing Manager and the invoice number is passed in the URL the registration module will lookup the customer invoice and prepopulate the registration form with the invoice number, amount and customer information.
- After an invoice is paid the invoice will be marked as paid and viewable as a paid invoice in Billing Manager.
[up to contents]
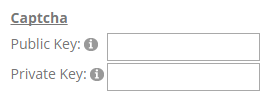
Captcha
The Registration module uses Google's reCAPTCHA to protect your website from spam and abuse. Signup for your reCAPTCHA keys at the following link: https://www.google.com/recaptcha/admin#whyrecaptcha
Display Captcha – Drag the Captcha onto your form in the form builder.
Public Key – Enter the Public Key (Site Key) you received from your Google Recaptcha registration of your domain.
Private Key – Enter the Private Key (Secret Key) you received from your Google Recaptcha registration of your domain.
[up to contents]
User Profile Page

Redirect Logged In Users – When enabled logged in users will be redirected to the user profile page. Enabling this option also prevents the user from being allowed to register when they are already logged in.
User Profile URL – Enter the URL to the user profile page in your portal. This URL is used only when the "Redirect Logged In Users" checkbox is checked above.
[up to contents]