To access the Product Setup screen, either Add a New Product or Edit an existing Product.
Product Fields
The following settings are available in the Product Fields section:
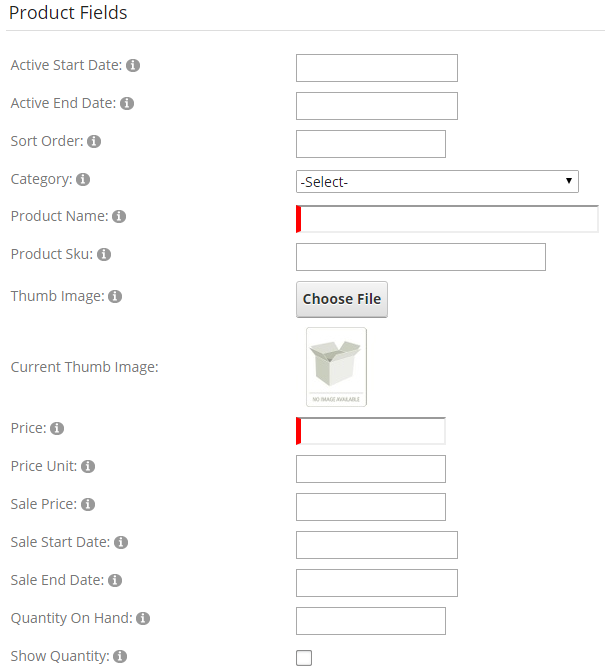
Active Start Date – Select the date to activate this product.
Active End Date - Select the date to deactivate this product.
Sort Order – The sort order field controls the order in which the products are displayed in the product catalog. Enter an integer number.
Category - Select the category for this product.
Product Name – Enter your product name in this field. The product name is displayed to the user in the Registration page and checkout screens of the Registration module.
Product Sku – Enter your product sku. If you are using the Microsoft CRM integration then this field is used to populate the product id field in the payment history and recurring payment entities. This field is optional unless you are using Microsoft Dynamics integration.
Price - Enter the price of the product in this field.
Price Unit – The cost or price of an item based on the unit of measure. If you populate the unit price field, the price per unit is displayed next to the product price on the Registration page.
Sale Price - Provides the ability to set a sale price for a product.
Sale Start Date – Select the date to start your sale.
Sale End Date - Select the date to end your sale.
Quantity On Hand – The quantity on hand field is used to manage your available inventory for your product. Enter the current available product quantity you have available in your inventory. Every time a user purchases a unit of product the quantity on hand is decremented by the number of units purchased.
Show Quantity – Check this box to display the “Quantity on Hand” column during checkout. If not checked the Quantity On Hand will be hidden.
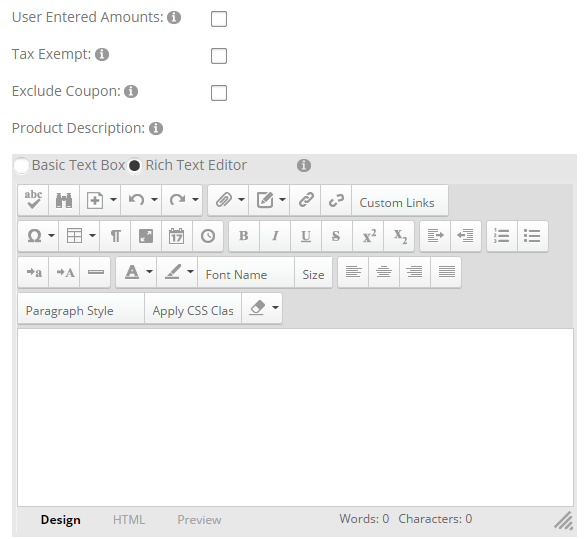
User Entered Amounts – Check this box if you would for the user to be able to enter a price for your product or service. This option is typically used for online bill payment or sites that collect online donations.
Tax Exempt - Check this box if you do not want to charge tax for the product.
Exclude Coupon – Check this box if you wish to exclude this product from being discounted when the user enters a valid coupon code during checkout. This enables you to choose which products are discounted when you have an active coupon enabled.
Product Description - Enter a detailed product description using the rich text editor. HTML fully supported.
User Role Setup
The user role setup section allows you to configure the module to add and/or remove the user from one or more roles after successful registration.
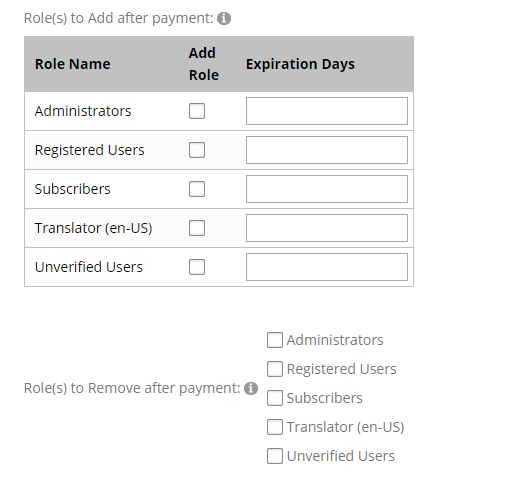
Role(s) to Add after Successful Payment – The Registration module allows you to select multiple roles to add a user to upon successful registration and credit card authorization, the user will be placed in the roles that you choose here. All the currently defined roles in your DNN portal will be available as checkboxes.
To add new roles, go to the DNN Admin menu > Security Roles menu option. Default DNN roles are Administrators, Registered Users, Subscribers, Translator, and Unverified Users.
Role(s) to Remove after Successful Payment – The Registration module allows you to select one or more roles to remove a user from upon successful registration and credit card authorization; the user will be removed from the roles that you choose here. All the currently defined roles in your DNN portal will be available as checkboxes.
Discounts By Role
Configuring Discounts By Role will define the DNN Role and discount that will be applied to the order. For more information about Discounts By Role, see the Discounts KB article.
Recurring Billing
The following settings are used to configure the recurring billing options in the Registration module.
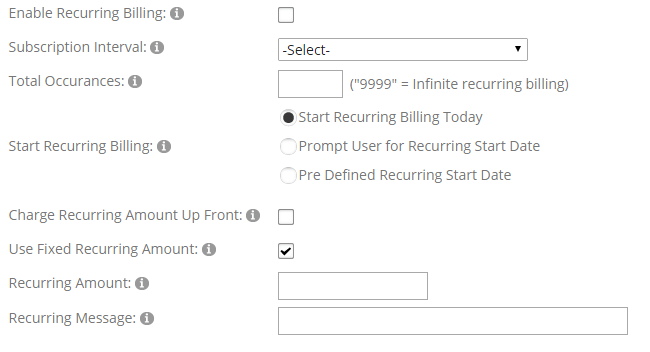
Enable Recurring Billing – Check this box if you want to enable recurring billing for the product.
Subscription Interval – This dropdown box is where you select the subscription interval for the products recurring payments. The following recurring intervals supported are:
- Weekly
- Every 2 Weeks
- Monthly
- Every 2 Months
- Quarterly (Every 3 Months)
- Semi-Annually
- Yearly
Example: If you choose monthly and the user registers on 1/1/09, the first payment will be automatically billed on 1/1/09 at midnight. Their second payment will be billed 2/1/09 and so on.
Total Occurrences - This setting only applies if you have checked the box for recurring billing above. Enter a numeric value for the number of times that you want the recurring billing to charge the customer. Enter "12" to bill the customer’s card 12 times. Enter "9999" to have the recurring billing continue until being cancelled manually.
Start Recurring Billing Today – Choose when to start the recurring billing.
- Start Recurring Billing Today – When selected recurring billing transaction will start the date of the transaction.
- Prompt User for Recurring Start Date - When selected the user will be prompted to enter the start date for the recurring billing.
- Pre-Defined Recurring Start Date – When selected allows you to enter a specific month and day to start recurring billing.
Charge Recurring Amount Up Front – Check this box to charge all Recurring Occurrences up front.
Use Fixed Recurring Amount – Check this box to use a fixed recurring amount.
When Use Fixed Recurring Amount is enabled, the following setting will be displayed:

Recurring Amount – Enter the recurring amount to charge.
Recurring Message - Enter the recurring message.
Trial Subscriptions
Trial Subscriptions allow you to configure an initial trial period of time and amount where you offer free or discounted access to your subscription or membership. For example, you can offer users 7 days of free unlimited access to your service before the normal recurring billing charge starts. The user will be required to enter their billing information and credit card, but will not be charged until after the trial period has expired.
Note: Trial only works with Auth.net and Eway payment gateways.
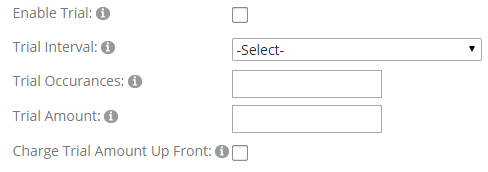
Enable Trial – Check this box to enable Trial Subscriptions.
Trial Interval – This dropdown list allows you to configure the interval on your trial subscriptions. The following trial intervals are supported:
- Daily
- Weekly
- Monthly
- Semi-Annually
- Yearly
Trial Occurrences - Number of billing occurrences or payments in the trial period.
Trial Amount - The amount to be charged for each payment or occurrence during a trial period. To enable a free trial enter 0 here.
Charge Trial Amount Up Front – Check this box to charge the full actualized trial amount up front when the user checks out. For example, if you have checked “Charge Trial Amount Up Front” and have configured your trial settings as follows:
- Trial Interval = Monthly
- Trial Occurrences = 3
- Trial Amount = $15
When the user checks out and successfully pays they will be charged $45 up front and the normal recurring billing charges will start in three months after the trial period ends. Once the number of trial occurrences for the subscription is complete, the regular amount you entered in the product price field or recurring billing amount field will be charged for the remaining recurring payments.